amplify-(amazon|auth0|facebook|oauth)-button / Amplify UI Components のドキュメントに無いコンポーネント紹介2
[point_maker type=“heading_icon” base_color=“apple_green” title_icon=“info-circle-solid” title_color_background=“true” title_color_border=“false” content_type=“text” content_color_background=“true” content_color_border=“false” block_editor=“true”]
こちらは、 “ゆるWeb勉強会@札幌 Advent Calendar 2020” の 9日目の記事です。
[/point_maker]
前回は amplify-google-button の紹介でした。
https://blog.tacck.net/archives/947
もちろん、他の認証を使ったボタンも存在しています。
が、 Google 以外の Federation 認証を使ったことが無いので、今回は紹介だけに留めておきます。
amplify-amazon-button
画面はこちら。

GitHub はこちらになります。
こちらも Google の時と同じように client-id を設定すると使える想定、のようです。
ボタンの文言変更する時は、 Translations.SIGN_IN_WITH_AMAZON を設定すれば良いようです。
amplify-auth0-button
画面はこちら。

GitHub はこちらになります。
こちらは config プロパティで認証情報を設定するようです。
ボタンの文言変更する時は、 Translations.SIGN_IN_WITH_AUTH0 を設定すれば良いようです。
amplify-facebook-button
画面はこちら。

GitHub はこちらになります。
こちらは app-id で認証情報を設定するようです。
ボタンの文言変更する時は、 Translations.SIGN_IN_WITH_FACEBOOK を設定すれば良いようです。
amplify-oauth-button
画面はこちら。

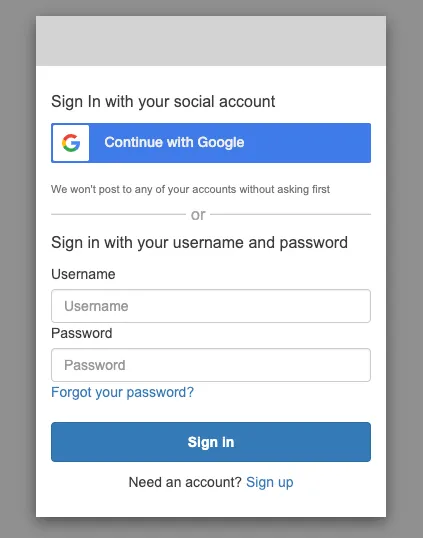
ボタンをクリックすると、 Cognito が提供するこの画面が表示されます。

GitHub はこちらになります。
config で設定をするようですが、コードをみた感じ config.label 以外は明示的にこのコンポーネントでは触らないようです。(が、私はうまく設定できませんでした。)
ボタンの文言は、 config.label が設定されていればそちらを、未設定であれば Translations.SIGN_IN_WITH_AWS を使うようです。
まとめ
Federation 認証周りは、機能として提供されていて使うことはできると思いますが、ドキュメント関係がまだ十分には整備されているとは言い難い気がします。
少しでも情報提供になれば、幸いです。