
[point_maker type=“heading_icon” base_color=“apple_green” title_icon=“info-circle-solid” title_color_background=“true” title_color_border=“false” content_type=“text” content_color_background=“true” content_color_border=“false” block_editor=“true”]
こちらは、“ゆるWeb勉強会@札幌 Advent Calendar 2021” の 25日目の記事です。
[/point_maker]
メリークリスマス!
アドベントカレンダーも最終日のクリスマス、そしてクリスマスと言えばラズパイですよね!
ということで、 ゆるWeb勉強会@札幌 Advent Calendar 2021 の最後は、 AWS Amplify を使って Raspberry Pi でにつなげた LED のツリーを光らせてみたいと思います。
ちなみに、このシリーズも5年目、すでに6本の記事を書いています。去年・一昨年に二本づつ書いていたのは良い思い出。
- 2020年 / クリスマスの定番(?) Raspberry Pi と超音波センサーでクリスマスツリーを光らせて SORACOM Harvest Data でデータ収集
- 2020年 / クリスマスの定番(?) Raspberry Pi と SORACOM LTE-M Button で光るクリスマスツリーを作成 [アナザースタイル]
- 2019年 / クリスマスの定番(?) Raspberry Pi と Philips Hue でクリスマスツリーをライティング (Nintendo Switch Joy-Con version)
- 2019年 / クリスマスの定番(?) Raspberry Pi と Philips Hue でクリスマスツリーをライティング [アナザースタイル]
- 2018年 / クリスマスの定番(?) Raspberry PiとAlexaで光るクリスマスツリーを作る【動画あり】
- 2017年 / クリスマスの定番(?) Raspberry Piで光るクリスマスリースを作る【動画あり】
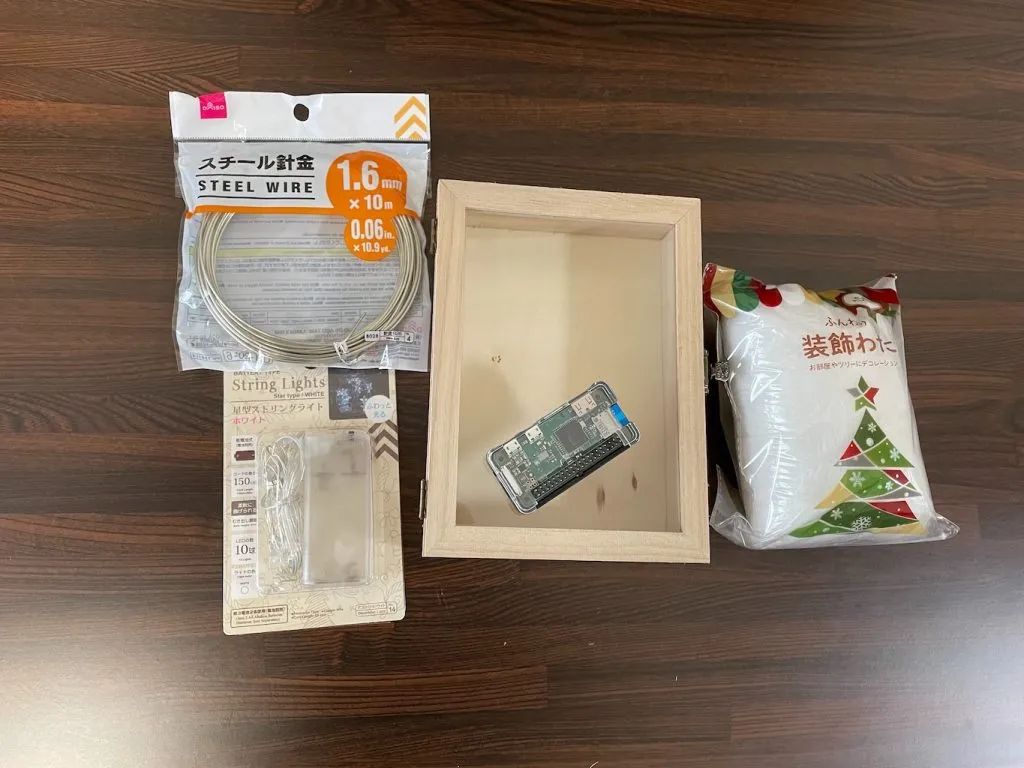
揃えるもの
Raspberry Pi ZERO WH
サイズの関係上、こちらを使います。開発時は Raspberry Pi 3 などでやった方が良いでしょう。
(Node.js は入れ直す必要があるかもしれないです)
ツリー関係
100均で色々と揃えましょう。
今回は「針金で作ったツリーにLED装飾をして木箱に入れて光らせる」というものを作りました。
手順
AWS Amplify 側の実装
要素としては
- 操作画面 (React)
- 操作結果を Raspberry Pi へ伝えるAPI (AppSync)
の二つあれば十分です。
ささっと作りましょう。
未経験の方は、本家の Tutorial を一度試してみると良いです。
https://docs.amplify.aws/start/getting-started/setup/q/integration/react/
プロジェクト作成
npx create-react-app amplify-tree
cd amplify-tree
npm install aws-amplify @aws-amplify/ui-react
amplify init -y
API 追加
$ amplify add api
? Select from one of the below mentioned services: GraphQL
? Here is the GraphQL API that we will create. Select a setting to edit or continue Authorization modes: API key (default, expiration time: 7 days from now)
? Choose the default authorization type for the API API key
? Enter a description for the API key:
? After how many days from now the API key should expire (1-365): 365
? Configure additional auth types? No
? Here is the GraphQL API that we will create. Select a setting to edit or continue Continue
? Choose a schema template: Single object with fields (e.g., “Todo” with ID, name, description)

⚠️  WARNING: your GraphQL API currently allows public create, read, update, and delete access to all models via an API Key. To configure PRODUCTION-READY authorization rules, review: https://docs.amplify.aws/cli/graphql/authorization-rules

GraphQL schema compiled successfully.

Edit your schema at /home/ec2-user/environment/amplify-tree/amplify/backend/api/amplifytree/schema.graphql or place .graphql files in a directory at /home/ec2-user/environment/amplify-tree/amplify/backend/api/amplifytree/schema
✔ Do you want to edit the schema now? (Y/n) · no
✅ Successfully added resource amplifytree locally

✅ Some next steps:
"amplify push" will build all your local backend resources and provision it in the cloud
"amplify publish" will build all your local backend and frontend resources (if you have hosting category added) and provision it in the cloud

$
画面のコード
amplify-tree/src/index.js
import React from 'react';
import ReactDOM from 'react-dom';
import './index.css';
import App from './App';
import reportWebVitals from './reportWebVitals';

import Amplify from "aws-amplify";
import { AmplifyProvider } from '@aws-amplify/ui-react';
import '@aws-amplify/ui-react/styles.css'; // default theme

import awsExports from "./aws-exports";
Amplify.configure(awsExports);

ReactDOM.render(
  <React.StrictMode>
    <AmplifyProvider>
      <App />
    </AmplifyProvider>
  </React.StrictMode>,
  document.getElementById('root')
);

// If you want to start measuring performance in your app, pass a function
// to log results (for example: reportWebVitals(console.log))
// or send to an analytics endpoint. Learn more: https://bit.ly/CRA-vitals
reportWebVitals();
amplify-tree/src/App.js
import { Button, Flex } from '@aws-amplify/ui-react';

import Amplify, { API, graphqlOperation } from 'aws-amplify'
import { createLevel } from './graphql/mutations'

function App() {
  return (
    <div className="App">
      <Flex
        alignItems="center"
        width="100%"
        height="3rem"
        gap="1rem"
        direction="column"
      >
        <Button
          width="50%"
          variation="primary"
          onClick={() => turnOn()}
          ariaLabel=""
        >
          Turn On
        </Button>
        <Button
          width="50%"
          variation="primary"
          onClick={() => blink()}
          ariaLabel=""
        >
          Blink
        </Button>
        <Button
          width="50%"
          variation="primary"
          onClick={() => turnOff()}
          ariaLabel=""
        >
          Turn Off
        </Button>
      </Flex>

    </div>
  );
}

async function turnOn() {
  await controlLed('HIGH');
}

async function turnOff() {
  await controlLed('LOW');
}

async function blink() {
  await controlLed('BLINK');
}

async function controlLed(level) {
  try {
    await API.graphql(graphqlOperation(createLevel, { input: { level: level } }));
  }
  catch (err) {
    console.log('error createLevel:', err);
  }
}

export default App;
Amplify UI 2.0 になったので、追加の CSS フレームワークがなくても簡単な画面ならすぐに作れます。素晴らしいですね。
Amplify UI 2.0 のざっくり解説記事はこちら。
https://blog.tacck.net/archives/1254
GraphQL Schema
type Level @model @auth(rules: [ { allow: public } ]) {
  id: ID!
  level: String!
}
今回は電圧のレベルを伝える、的な意味合いでこのようにしています。 Subscription 機能も自動で有効になるのでとても簡単です。
デプロイ
developer:~/environment/amplify-tree (master) $ amplify add hosting
? Select the plugin module to execute Hosting with Amplify Console (Managed hosting with custom domains, Continuous deployment)
? Choose a type Manual deployment
You can now publish your app using the following command:
Command: amplify publish
developer:~/environment/amplify-tree (master) $ amplify publish
⠴ Fetching updates to backend environment: dev from the cloud.GraphQL schema compiled successfully.
Edit your schema at /home/ec2-user/environment/amplify-tree/amplify/backend/api/amplifytree/schema.graphql or place .graphql files in a directory at /home/ec2-user/environment/amplify-tree/amplify/backend/api/amplifytree/schema
✔ Successfully pulled backend environment dev from the cloud.
Current Environment: dev
┌──────────┬────────────────┬───────────┬───────────────────┐
│ Category │ Resource name │ Operation │ Provider plugin │
├──────────┼────────────────┼───────────┼───────────────────┤
│ Hosting │ amplifyhosting │ Create │ awscloudformation │
├──────────┼────────────────┼───────────┼───────────────────┤
│ Api │ amplifytree │ No Change │ awscloudformation │
└──────────┴────────────────┴───────────┴───────────────────┘
? Are you sure you want to continue? Yes
⠧ Building resource api/amplifytreeGraphQL schema compiled successfully.
Edit your schema at /home/ec2-user/environment/amplify-tree/amplify/backend/api/amplifytree/schema.graphql or place .graphql files in a directory at /home/ec2-user/environment/amplify-tree/amplify/backend/api/amplifytree/schema
⠇ Updating resources in the cloud. This may take a few minutes...
(snip)
✔ Zipping artifacts completed.
✔ Deployment complete!
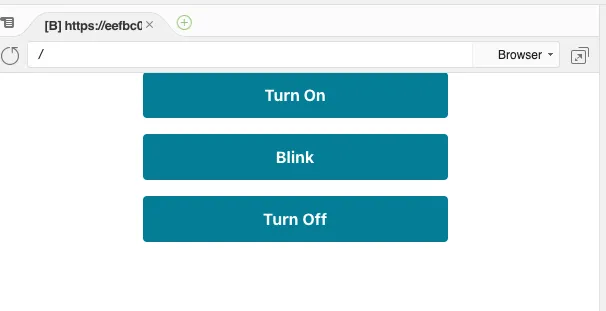
https://dev.XXXXXXXXXXXXXX.amplifyapp.com
developer:~/environment/amplify-tree (master) $
このような画面を見れたら完成です。
RaspberryPi 側の実装
こちらは、上で作った Amplify の API を受信して動作するようにしていきます。
基本は先日の記事を参考に進めてください。
https://blog.tacck.net/archives/1313
使用するファイル類はこのようになりました。
package.json
{
  "name": "appsync",
  "version": "1.0.0",
  "description": "",
  "main": "index.js",
  "scripts": {
    "test": "echo \"Error: no test specified\" && exit 1"
  },
  "keywords": [],
  "author": "",
  "license": "ISC",
  "dependencies": {
    "apollo-cache-inmemory": "^1.6.6",
    "apollo-client": "^2.6.10",
    "apollo-link": "^1.2.14",
    "apollo-link-http": "^1.5.17",
    "aws-appsync": "^4.1.4",
    "aws-sdk": "^2.1046.0",
    "es6-promise": "^4.2.8",
    "graphql": "15.7.0",
    "graphql-tag": "^2.12.6",
    "isomorphic-fetch": "^3.0.0",
    "rpio": "^2.4.2",
    "ws": "^8.3.0"
  },
  "devDependencies": {
    "eslint": "^8.5.0",
    "eslint-config-prettier": "^8.3.0",
    "prettier": "^2.5.1"
  }
}
index.js
'use strict';

global.WebSocket = require('ws');
require('es6-promise').polyfill();
require('isomorphic-fetch');

// Controll LED
const rpio = require('rpio');
const setLevel = require('./controlLed').setLevel;
const setBlink = require('./controlLed').setBlink;

// Require AppSync module
const AUTH_TYPE = require('aws-appsync-auth-link/lib/auth-link').AUTH_TYPE;
const AWSAppSyncClient = require('aws-appsync').default;

const aws_exports = require('./aws-exports').default;
const url = aws_exports.ENDPOINT;
const region = aws_exports.REGION;
const type = AUTH_TYPE.API_KEY;
const apiKey = aws_exports.API_KEY;

const AWS = require('aws-sdk');
AWS.config.update({
  region: aws_exports.REGION,
});

// Set up a subscription query
const gql = require('graphql-tag');
const subquery = gql(`
  subscription OnCreateLevel {
    onCreateLevel {
      level
    }
  }
`);

const client = new AWSAppSyncClient({
  url: url,
  region: region,
  auth: {
    type: type,
    apiKey: apiKey,
  },
  disableOffline: true,
});

client.hydrated().then(function (client) {
  //Now subscribe to results
  const observable = client.subscribe({ query: subquery });

  const realtimeResults = function realtimeResults(data) {
    console.log('realtime data: ', data.data);
    if (data.data.onCreateLevel.level === 'HIGH') {
      setLevel(rpio.HIGH);
    } else if (data.data.onCreateLevel.level === 'BLINK') {
       setBlink()
    } else {
      setLevel(rpio.LOW);
    }
  };

  console.log('start subscription');
  observable.subscribe({
    next: realtimeResults,
    complete: console.log,
    error: console.log,
  });
});
controlLed.js
'use strict';
const rpio = require('rpio');
const LED_PIN = 5;
const GROUND_PING = 6;
let ledLevel = rpio.LOW;
rpio.open(LED_PIN, rpio.OUTPUT, rpio.LOW);
let intervalObject = null;
let timeoutObject = null;
module.exports.setLevel = function(level) {
ledLevel = level;
if (intervalObject) {
clearInterval(intervalObject);
intervalObject = null;
}
if (timeoutObject) {
clearTimeout(timeoutObject);
timeoutObject = null;
}
intervalObject = setInterval(() => {
rpio.write(LED_PIN, ledLevel);
}, 500);
};
module.exports.setBlink = function() {
ledLevel = rpio.LOW;
if (intervalObject) {
clearInterval(intervalObject);
intervalObject = null;
}
if (timeoutObject) {
clearTimeout(timeoutObject);
timeoutObject = null;
}
const blinkFunc = function() {
if (ledLevel === rpio.HIGH) {
ledLevel = rpio.LOW;
}
else {
ledLevel = rpio.HIGH
}
rpio.write(LED_PIN, ledLevel);
timeoutObject = setTimeout(blinkFunc, 500);
}
timeoutObject = setTimeout(blinkFunc, 500);
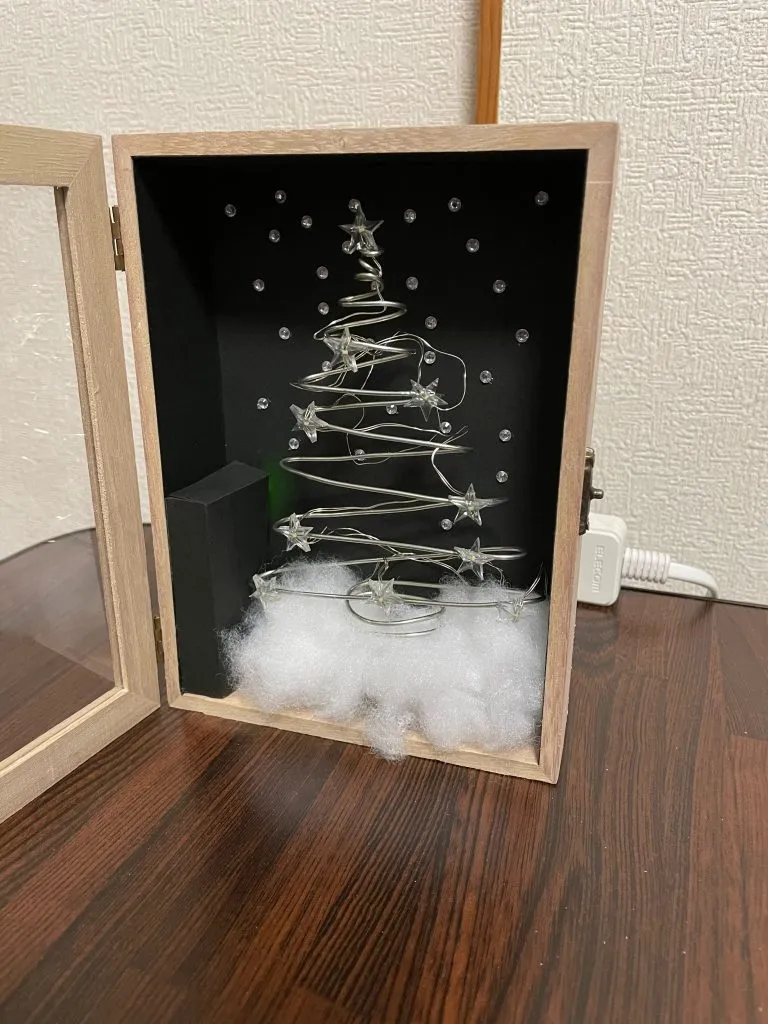
};ツリー
ツリーは各自の思い思いのものを作ってください。
今回は、このような形で作りました。レジン用の紫外線ライトをセリアで見つけたので、今回はレジンを使って色々固定しています。慣れると便利ですね。
動作
では動作させてみましょう。この動画のように操作できれば成功です!!
まとめ
AWS Amplify の API (GraphQL) を使って、無事に Raspberry Pi の LED を操作することができました。
これで、今後のラズパイライフの選択肢がかなり増やせそうですね。
みなさんも、ぜひラズパイで LED を光らせてみてください!